Monday, November 7, 2011

White Chicken Chili

This is a recipe that a friend brought to the same baby shower that I made the caramel apple bars (see below). It was good enough that I requested the very next day.What I like about this chili, the taste is really good and the additions of melting the cheese and sour cream at the end gives is a creamy consistency. It goes together pretty quickly.


White Chicken Chili
(adapted from "The Food Nanny Rescues Dinner" by Liz Edmunds


 1 lb. boneless, skinless chicken breasts (cooked and diced)
1 T. olive oil
1 small white onion, diced
3-4 cloves garlic, minced
1 small can diced green chiles, drained
2 - 15oz. cans white beans, drained
4 c. water
4 t. "Better Than Bouillon" chicken base
2 t. ground cumin
2 t. dried oregano
1/2 to 1 t. cayenne pepper (I used these amount of spices - it was just the right amount, spicy but not too much so)
1 t. salt
1 c. sour cream
2 c. shredded Monterey Jack cheese
  chopped tomato
  chopped cilantro
  diced avocado

Heat oil in large pan over medium heat.  Add the onion and garlic, and cook and stir until the onion is translucent, 2-3 minutes.  Add the chicken, chiles, beans, chicken base mixed with water, cumin, oregano, and cayenne.  Simmer 30 - 45 minutes.  Add the sour cream and cheese, and continue cooking until the cheese is melted.  Keep warm until serving.  Serve in bowls and top with tomatoes, avocado, and cilantro.

Edited: I baked 3 chicken breasts and shredded them for my chicken. Ialso used 2 more cups of water and 2 more tsp of chicken base. I wanted my chicken chili to be between a soup and a chili consistency. I also only used 1/8 tsp cayenne pepper since I was serving it to my kids. I figured I could add more later, but thought it had the right amount of kick.

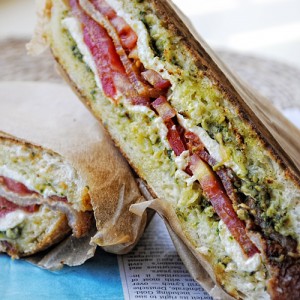
This is definitely going in my stack of favorites! We served our with these mozzarella, pesto, bacon and tomato paninis (recipe HERE).

Thursday, November 3, 2011

Caramel Apple Cheesecake Bars with Streusel Topping

Made this tonight for a baby shower. They got rave reviews :) (thus the reason I need to post it, so that some of my lovely friends can get it here). We love rave reviews. Even though they have multiple layers, they really didn't take that long to put together. You bake the crust then layer the rest on and bake it one more time. Then drizzle the caramel on top. The caramel really only took about 5-7 minutes to cook, so don't be intimidated.


Caramel Apple Cheesecake Bars with Streusel Topping

Base:
2 cups all-purpose flour
1/2 cup firmly packed brown sugar
¼ teaspoon salt
½ teaspoon cinnamon
1 cup (2 sticks) butter, softened

Cream Cheese Layer:
2 (8-ounce) packages cream cheese, softened
1/2 cup sugar
2 large eggs
1 teaspoon vanilla extract

Apples:
3 Granny Smith apples, peeled, cored and finely chopped
2 tablespoons sugar
1/2 teaspoon ground cinnamon
1/4 teaspoon ground nutmeg

Streusel Topping:
1 cup firmly packed light brown sugar
1 cup all-purpose flour
½ teaspoon cinnamon
1/2 cup quick cooking oats
1/2 cup (1 stick) butter, softened
1 cup caramel sauce (homemade recipe below)

Preheat oven to 350 degrees F.

In a small bowl, stir together chopped apples, two tablespoons sugar, cinnamon, and nutmeg. Set aside.
In a medium bowl, combine all the streusel topping ingredients and mix until crumbly. Set aside.
In a medium bowl, combine flour and brown sugar. Cut in butter with a pastry blender or two forks until mixture is crumbly but combined. Press evenly into a 9X13-inch baking pan lined with aluminum foil. Bake for 10 minutes or until lightly browned.

While the crust is baking, in a large bowl, beat cream cheese with 1/2 cup sugar until smooth. Then add eggs, one at a time and then the vanilla. Mix well. Pour over the warm crust.
Spoon the apple mixture evenly over the cheesecake layer. Sprinkle the streusel topping over the apples. Bake for 30 minutes until the filling is set.

Cool the bars to room temperature. Drizzle with the caramel topping (or plate individual slices and drizzle with topping one by one).

Caramel Sauce:
4 tablespoons butter
1 cup firmly packed light brown sugar
½ cups half-and-half or cream
Pinch of salt
1 tablespoon vanilla

Mix butter, brown sugar, half-and-half or cream, and salt in a saucepan over medium-low heat. Bring the mixture to a simmer and cook while whisking gently for 5 to 7 minutes, until thickened slightly. Add the vanilla and cook another minute to thicken further. Turn off the heat and pour the sauce into a jar. Refrigerate until cold. If the caramel sauce has cooled in the fridge long enough to harden, warm slightly before drizzling on bars.

Edited: I got this from melskitchencafe.com. I don't love using a ton of bowls (less to clean later) so I mixed my base in one bowl. While it was cooking I mixed whipped up my cream cheese mixture in my mixer, then cut up my apples in the same bowl I mixed the base. When crust was done, I poured cream cheese, then apple mixture, then mixed streusel in apple bowl (used the same bowl 3 times) and finished with that. So I onlyh needed one bowl and my mixer. 

The caramel might seem intimidating, but it really wasn't that tough to do. It came together in just about 7 minutes. Cook to just under soft ball stage so they it is thick enough that it doesn't run off the bars. If you don't want to go to the trouble, I suppose you could just using ice cream topping.

Tuesday, August 9, 2011

Salted Caramel Butter Bars

The name says it all. Whats not to like? Salted caramel.... butter. 


Salted Caramel Butter Bars

1 lb salted butter at room temperature
1 cup sugar
1 1/2 cups powdered sugar
2 tsp. vanilla
4 cups all purpose flour

For the filling:

1 bag (14 oz) caramel candies (about 50) unwrapped
1/3 cup milk or cream
1/2 tsp vanilla
1 Tbl coarse sea salt (optional)

To make the crust:

In a large bow, combine the butter and sugars. Using a mixer o medium speed, beat together until creamy. Add the vanilla and beat until combined. Sift the flour into the butter mixture and bea on low speed until a smooth soft dough forms.

Spray a 9 X 13 inch baking pan lightly with non-stick cooking spray. Press 1/3 of the dough evening into the pan to for a bottom crust. Bake approximately 20 minutes (mine took about 25 minutes). Let cool for 15 - 20 minutes

While bottom crust us baking and remaing dough is chilling, make the caramel filling. Place caramels in a microwave safe bowl. Add the cream/milk. Microwave on high for 1 minutes. Remove from the microwave and stir until smooth. If caramels are not completely melted, microwave on high for 30 second intervals, stirring after each interval until smooth.

Pour the caramel filling over the crust. If you are going to salt the caramel, sprinkle it on caramel layer now.

Remove the remaining chilled dough from refrigerator and crumble it evening over the caramel. Return the pan to the oven and bake until the filling is bubbly and the crumbled shortbread topping is firm and lightly golden, about 25-30 minutes (mine took 30-35 minutes)

Let cool before cutting into squares. These are very rich, so cut them into 1" squares.

Also the recipe says to put 1/3 on the bottom then bake, after adding the caramel layer you crumble the other 2/3 of the dough on top. I think I would do 1/2 on the bottom and crumble the other half on top.

Thursday, June 16, 2011

Honey Sesame Chicken


Saw this recipe a few weeks back and put it on my list of things to try. We like chinese food, but

1. hate the prices (when you are feeding a family of 6, 2 being full grown men/boys) and

2. sometimes it can be really fattening or the chicken can be a little junky.

What I loved about this recipe... the taste.

What I didn't love.... coating and frying all the chicken pieces.

When I try this again, I think I will cut my chicken into pieces and then just cook them in a pan with a little olive oil. Remove the chicken, make the sauce, replace the chicken in the pan to coat with sauce. Then serve over rice. This makes the recipe much easier (don't you hate the smell in your kitchen after frying stuff) and much healthier. Yes, the crunchy battered coating is delicious, but if you are lazy like me, this is a good alternative. Or maybe I should say I am looking for a healthy alternative. Doesn't that make me sound more posh?

The sauce was easy and very tastey. I cut the oil down by half and doubled it as I wanted enough sauce to drizzle over on the rice when serving. I actually doubled the recipe, so really I quadrupled the sauce recipe.

Honey Sesame Chicken

Ingredients:

1 ½ lbs boneless skinless chicken breasts (cut into 1” chunks)
Oil (for deep frying)

Batter-
4 tablespoons cornstarch
¼ cup flour
1 teaspoon baking powder
½ cup water
½ teaspoon salt
1 egg
1 egg white

Sauce-
1 ½ tablespoons oil
2 teaspoon ginger (minced)
3 tablespoons garlic (minced)
1 teaspoon salt
3 tablespoons honey
1 teaspoon rice wine vinegar
½ cup water
1 teaspoon cornstarch (mixed with 1 teaspoon water)
Sesame seeds (for garnish)

Step 1: In a large bowl mix all batter ingredients together until smooth. Cover and allow the batter to site for at least 30 minutes. Add the chicken to the batter tossing to coat.

Step 2: Heat a deep fryer to 350 degrees. Fry chicken bits in patches for 2 minutes or until batter becomes firm. Drain on paper towels.

Step 3: To make the sauce. Heat 1 ½ tablespoons of oil in your wok. Add garlic and ginger and stir fry for 30 seconds. Add salt, honey, vinegar, and water. Mix well. Combine 1 teaspoon of water with 1 teaspoon of cornstarch. Add to the sauce and Simmer for 2 minutes.

Step 4: Coat chicken with the sauce and garnish with sesame seeds. Serve with white rice.
(Makes 4 servings)

Tuesday, June 14, 2011

Steak or Chicken Fajitas

(picture borrowed from ourbestbites.com)

This recipes comes from one of my favorite food blogs ourbestbites.com. I've made it twice and the hubs has raved both times. He said if he closed his eyes he felt like he was eating fajitas at a good restaurant. I think it's especially delicious because you marinade the meat (I used chicken) and vegetables beforehand and then grill them all which adds a lot of yummy flavor. If you are a fan of Mexican food, I would definitely give this recipe a try!

Chicken or Steak Fajitas

Measurements of meat and vegetables are approximate. Adjust depending on your preference and the number of people you’re serving. This will serve about 4-6.

1 lb boneless skinless chicken breasts, chicken thighs, or steak
2-3 bell peppers, stem and membranes removed and peppers quartered
1 large onion (any color/variety) sliced into 1/2″ slices
Marinade:
1/4 C fresh lime juice
1/3 C water
2 T vegetable oil
2 cloves garlic, pressed or finely minced
3 t vinegar
2 t soy sauce
1-2 t liquid smoke*
1 t salt
1/2 t chili powder, or chipotle chili powder
1/2 t cayenne pepper
1/4 t ground black pepper
1/4 t onion powder

*If you’re not familiar with liquid smoke, you can find it near the bbq sauces. Don’t make this without it! It’s definitely one of the key components. It makes things yummy and smoky and super flavorful. And if you’re wondering, it actually is real smoke in liquid form. Interesting, eh?

Place meat in a zip-top bag or shallow dish. Place vegetables in another. In a medium bowl, combine all marinade ingredients and whisk well. Reserve 3-4 Tablespoons of marinade for later use. With remaining marinade, add a splash to the vegetables (enough for a light coating) and the remaining to the meat. Marinate for 4-6 hours and up to overnight.

Preheat bbq grill (my preference), indoor grill pan, or large skillet. If you’re using a grill, place everything on at the same time. If using a skillet, slice peppers and onions first. Cook chicken for a few minutes on each side until cooked through and remove from pan. Cover with foil to keep warm. Add vegetables and cook until crisp tender.

Remove vegetables from cooking surface and slice. Slice meat. Toss with reserved marinade and serve along side any or all of the following:

Flour Tortillas
Black Beans
Lime-Cilantro Rice
Pico de Gallo
Salsa
Diced avocado
Guacamole
Sour Cream (sorry, we just buy that one!)

Friday, June 10, 2011

Chocolate Chip Cookie Pie

No, it isn't healthy. Yes, it is delicious.
I attempted once before to make a recipe like this. Of course it was when we had company over and it earned a "fail" award. It was to greasy and never really set up. We have a restaurant in town that makes very yummy pies and one is a chocolate chip cookie pie. Since we love all things chocolate chip cookish, I had to give it another try. Success!!! This was wonderful with a scoop of vanilla ice cream and a little chocolate sauce dribbled over the top. Chocolate Chip Cookie Pie

1 unbaked 9-inch pie crust, homemade or store-bought. 2 large eggs 1/2 C flour 1/2 C white granulated sugar 1/2 C packed brown sugar 3/4 C real butter, softened (1 1/2 sticks) 1 C chocolate chips (semi-sweet or dark works best, you might find milk too sweet) 1 C chopped pecans (you are welcome to make it without nuts)

Vanilla ice cream, or sweetened whipped cream for serving (a must! I prefer ice cream)

optional: chocolate sauce (honestly, doesn’t really need chocolate sauce, but it looks pretty!)

Preheat oven to 325° F.

Beat eggs in large mixer bowl on high speed until foamy. Beat in flour, granulated sugar and brown sugar. Beat in butter. Stir in morsels and nuts. Spoon into pie shell.

Bake for 55 to 60 minutes or until knife inserted halfway between edge and center comes out clean. Cool on wire rack or serve slightly warmed. Serve with ice cream or whipped cream.

*There have been several comments about pies turning out runny. First and foremost, follow the instructions, completely (no margarine or anything from a tub!) I’ve made a million of these and never had that happen so I honestly have no idea. The recipe is correct as written, it comes straight from Nestle! The only thing I can think of is that altitude might be a factor. One reader suggested adding 2 Tbs of flour if you’re at a high altitude. If anyone finds that solves their problem, let me know!

Thursday, June 9, 2011

Homemade Ice Cream cookoff - Bring It!

Our Butler family reunion is in less than a month. As is customary, we are having a cooking contest. This year, since it will be summer and we want to try something that we haven't done before, we are doing.....


HOMEMADE ICE CREAM


So let the games begin and may the best family win!

When we get back the middle of July, we will be posting the recipes and pictures of the contest. Hopefully at least one batch will turn out decent. :)

If you have a wonderful homemade ice cream recipe or any tips, please share in the comments.