Saturday, August 30, 2008

Easy Monkey Bread

Since Liz hasn't shared her really yummy, homemade recipe for Monkey Bread, I guess I will share this semi-homemade one. (I will still be hoping and waiting for Liz to post hers)

I got this recipe off the Just That Good recipe blog. It's not as good as a totally homemade recipe (LIZ!) but it's good when you want something quick, easy and tasty.

Rolls

4 cans refrigerated biscuits (any flavor)
1 cup brown sugar
2 TBS cinnamon
1 stick butter
1/2 cup chopped pecans (optional)

Icing

2 cups powdered sugar
4 TBS milk
1 tsp vanilla

"First of all ... there is no need to buy the more expensive brand of biscuit with this recipe. Just get the cheap ones.Melt one stick of butter in bowl. Using kitchen scissors, cut each biscuit in half and place them in bowl with melted butter. After all biscuits are cut roll them around in the butter to coat all sides. Add brown sugar, cinnamon, and pecans. Stir well. Grease a bundt pan or 9x13 glass dish. Bake at 350* for about 35 minutes, depending on which dish you are using. The 9x13 will take longer. Just keep an eye on it.Remove from oven and flip bundt over while hot ... otherwise, your monkey bread will be stuck in the pan. Drizzle glaze on top. Serve warm."

Monday, August 18, 2008

Spanish Rice


Also for our Fiesta I made Spanish Rice. I have tried the boxed variety from Uncle Ben's and a few of the others and have never been impressed. I got this one from allrecipes.com also. The bacon gave it a smoky flavor which really added to the overall taste. I went a little lighter on the green pepper as the boys in our family are not fans. I ended up doubling this recipe and it made quit a bit. Try and tell me what you think.

Spanish Rice Original


INGREDIENTS

1 cup chicken broth
  • 1 cup tomato sauce
  • 6 slices bacon
  • 2 onions, diced
  • 1 cup uncooked white rice
  • 2 tomatoes, diced
  • 2 green bell peppers, diced
  • 1/2 teaspoon chili powder
  • 1/2 teaspoon salt and pepper to taste
  • 1 (10 ounce) can sliced black olives, drained (optional)
  • 1 (10 ounce) can whole kernel corn, drained (optional)
  • DIRECTIONS

    1. In a small saucepan over medium heat, combine chicken broth and tomato sauce. Bring to a boil while cooking the following.

    2. In a large skillet over medium heat, cook bacon until evenly brown. Chop bacon, and set aside, reserving the bacon fat. Add onion to skillet, and saute until tender. Stir in rice, and cook until lightly browned, 3 to 5 minutes. Pour in boiling chicken broth and tomato sauce. Add diced tomatoes, green peppers, and chopped bacon. Season with chili powder, salt, and pepper. Cover, and simmer for 30 to 40 minutes. Stir in black olives and corn.

    FOOTNOTE

    • If you are going to double the recipe (I usually make a doubled recipe), use the same amount of bacon strips and oil, and keep to 1 can of olives and 1 can of corn, double all other ingredients.

    Amy's Cilantro Cream Sauce


    We had a fiesta at Grandma and Grandpa Butler's last night. It was to celebrate our Seniors moving on into the big wide world. Not that we were celebrating them leaving, but more to wish them well. Rebecca has been working at Taco Time and fixed us some chicken soft tacos. So along with that I found this cilantro cream sauce. It got great reviews on allrecipes.com, you can view it at the reviews here. Some people used it as a dip, some on burgers and others on tacos. So if you are looking for something light, new and festive, here you go. BTW, I am not sure who Amy is so if you want to call the Lorri's Cilantro Cream Sauce, go ahead :)

    Amy's Cilantro Cream Sauce

    INGREDIENTS
    • 1 (8 ounce) package cream cheese, softened
    • 1 tablespoon sour cream
    • 1 (7 ounce) can tomatillo salsa
    • 1 teaspoon freshly ground black pepper
    • 1 teaspoon celery salt
    • 1/2 teaspoon ground cumin
    • 2 teaspoons garlic powder
    • 1 bunch fresh cilantro, chopped
    • 1 tablespoon fresh lime juice
    DIRECTIONS
    1. Combine cream cheese, sour cream, salsa, pepper, celery salt, cumin, garlic powder, cilantro and lime juice in a blender or food processor. Blend until smooth and creamy. Place in a serving bowl.
    Side note: My 18 year old son insisted on putting his hand in the picture because he is thinking of becoming a hand model.

    Friday, August 8, 2008


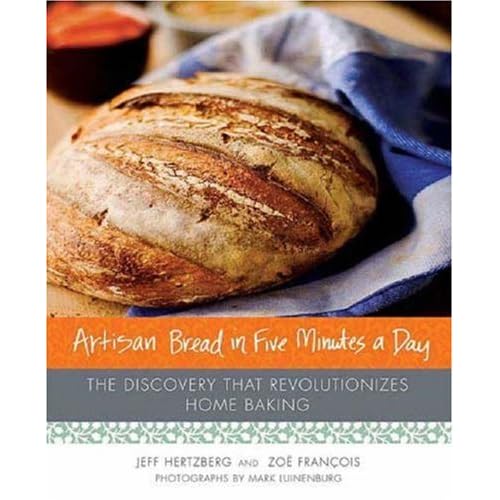
    I read about this book on another blog and have been trying to get my hands on it from the library every since. But since I was 151 in line for 6 books I finally just ordered it from Amazon. Basically the book gives you several recipes you can make ahead of time and then cut off a piece of dough when you are ready to make a loaf of artisan bread. The dough will keep in the fridge for up to 2 weeks, and the bread is suppose to get better the longer it sits. I made my first batch this afternoon and will let you know the results. They also have recipes for doughnuts, other types of breads and troubleshoots most problems you might run into. I will keep you posted and share whatever recipes I think are worth trying.
    Edited: I found this youtube video telling more about the book in case someone is interested.

    Monday, August 4, 2008

    Marilyne's Lion House Rolls


    So our Mom finally made these rolls for us. They were absolutely fantastic. In fact we begged for them again they were so great. Thank you so much for sharing the recipe. Mom also said they really weren't that hard to make so I am trying to gear myself up for the challenge.

    If you are interested in this heavenly and divine recipe go here.

    Saturday, July 5, 2008

    4th of July Cake


    So we were invited to a barbecue at a friends house and I was asked to make a dessert. I don't know about you, but this is when I foolishly like to try new recipes, which usually leads to disaster. But this time, I found a winner. It was what the pioneer woman was making, and she got it from the Barefoot Contessa. How can you go wrong with that. The cake was very moist and slightly denser than regular cake, but it was a good match for the frosting and fruit. I would highly recommend this. It has quit a bit of butter so it isn't for the faint of heart, but when you add the fresh fruit it "almost" looks healthy. I got many compliments on how pretty it looked and was the only dessert that got completely eaten.
    Note: I baked mine for 30 minutes and it still seemd a little soft in the middle, but it looked like the one on Pioneer Woman's website. Go here to see step by step directions with pictures.


    Barefoot Contessa’s Fourth of July Cake

    Cake:
    18 tablespoons (2 ¼ sticks) unsalted butter, at room temperature
    3 cups sugar
    6 extra-large eggs, at room temperature
    1 cup sour cream, at room temperature
    1 ½ teaspoons pure vanilla extract
    3 cups all-purpose flour
    1/3 cup cornstarch
    1 teaspoon kosher salt
    1 teaspoon baking soda

    Icing:
    1 pound (4 sticks) unsalted butter, at room temperature
    1 ½ pounds cream cheese, at room temperature
    1 pound confectioners’ sugar, sifted
    1 ½ teaspoons pure vanilla extract
    2 half-pints blueberries
    4 half-pints raspberries

    Preheat oven to 350 degrees. Butter and flour (or spray with baking spray) an 18 x 12 x 1 ½
    sheet cake pan.
    Cream the butter and sugar on high speed until light and fluffy. On medium speed, add eggs, 2
    at a time, then add sour cream and vanilla. Scrape down the sides and stir until smooth.
    Sift together the flour, cornstarch, salt, and baking soda in a bow. With the mixer on low speed,
    add the flour mixture to the butter mixture until just combined. Pour into the prepared pan. Smooth the top with a spatula. Bake in the center of the oven for 20-30 minutes, until a toothpick comes out clean. Cool to room temperature.

    For the icing, combine the butter, cream cheese, sugar, and vanilla in the bowl of an electric
    mixer. Mix just until smooth.
    Spread ½ of the icing on top of the cooled sheet cake. Outline the star section of the flag with a
    toothpick. Pipe two rows of icing, then place 2 rows of raspberries, alternately, to form the stripes of the cake. Fill the upper left corner with blueberries. Pipe stars on top of the blueberries.

    Serve at your Fourth of July celebration and send everyone home with a piece!
    Recipe courtesy of Barefoot Contessa, www.barefootcontessa.com.
    From the cookbook, “Barefoot Contessa Family Style”

    Friday, July 4, 2008

    Oven Baked Corn on the Cob

    We were at a local town street fair and they were selling this heavenly smelling corn on the cob. It was also fun to see people carrying their cobs around by the husks which had been folded back into a handle. So of course we hunted down the source of this fun treat and paid a whopping $3 for an ear of corn. I felt for that much I should also get a few directions on how to do this at home. So I went behind the serving kiosk and talked to the oven tender (is that an official position, if so I need to hire one when I am toasting bread in the oven because I always burn it). He just takes the ears of corn out of the box and throws them in the oven for about 30 minutes. When they are done he takes a cob out, peels the husks down so you can hold your hot cob of corn with this makeshift handle. He then brushes off what is left of the silks and hands them to the seller who rolls it in butter and gives it to the customer (the oven tender told me that there is a lot of sugar in the silks and when you remove them prior to cooking you miss out on some great flavor). There were several things to sprinkle on besides the traditional salt and pepper. Our favorite was Johnnys seasoning. But they also had paremsan, paprika, lemon pepper and so on. It was really yummy.

    So I decided to try it at home. I cooked it at 450 degrees for about 30 minutes and it came out perfect. The husks did get a little brown and there was a slight odor of burning husks in the house that was easy to get rid of. But how easy is that. You don't have to peel the corn anymore. Just throw it in the oven and cook away. Give it a try.


    Picture is courtesy of the internet. I will post a real picture of my finished product next time we make it (which will hopefully be this week).


    My husband said it was the best corn he had eaten and it was just from the grocery store. Imagie how divine to do it with fresh corn from your garden!

    I read somewhere else that you can soak your corn a little before cooking so the husks don't burn, but I wonder if that would dilute the flavor. Something to try. Maybe we will try half soaked and half not and see what turns out better. Good Luck!