Tuesday, May 31, 2011

Chicken Skewers with Sweet Red Chili Sauce


Don't Count Me Out!

It is May 31st and here I am keeping my promise to post at least monthly. I almost missed the deadline and in this family if you mess up there are some (Lorri) that will never let you forget it. I have had some grand intentions of posting, in fact my computer is full of pictures I have taken of foods we love, but do I share - NO! Yes, I am the sister that is hoarding her delicious recipes! Not to fear though, I am making a decision, right here - right now, to share so that you too can be an amazing cook like me. Okay just kidding - I'm not that great, but every once in a while I make something that is pretty dang good and I will start sharing. Take for example this last weekend, I grilled up some really, really good chicken, it is perfect for a group or just your family. I ended up marinading 8 lb. of chicken plus 3.5 lb. of steak (recipe to come later) and there was not even a morsel left. I highly recommend you trying this out ASAP - let me know what you think!
Chicken Skewers

30 wooden skewer sticks - soak in water 30 minutes before threading chicken strips so the skewers don't burn on the grill.

4 large chicken breast (I use tenderloins, just more of them) - cut into 1/2 inch strips

1/4 c. soy sauce
1 T. brown sugar
2 T. fresh lime juice
1 T. honey
1 T. fresh ginger, minced
1 clove garlic, minced

In a small mixing bowl, whisk together soy sauce, brown sugar, lime juice, honey, ginger and garlic. Put chicken strips in a gallon ziploc bag and pour marinade over the top - seal it up. Let marinade for a couple of hours or I like to prepare this the night before and let it sit in the fridge overnight for some really good flavor. Right before grilling thread the chicken onto skewer sticks then grill on medium heat 5- 10 minutes, turning often. Discard marinade. Serve chicken with a bowl of Sweet Red Chili Sauce for dipping. Delicious!!

Note: keep the marinade to chicken ratio equal so you get the wonderful flavor in the chicken - don't skimp!

Red Chili Sauce

1 red bell pepper
1/2 c. water
1/2 c. rice vinegar
1/2 tsp. toasted sesame oil
1/2 c. sugar
1/2 tsp. soy sauce
2 T. corn starch
1/4 tsp. crushed red chili flakes
1/2 tsp. kosher salt
In a blender puree all ingredients. Pour mixture into a small pan and bring to a boil. Stir constantly and cook until sauce thickens. Serve warm or chill.

Monday, May 23, 2011

Raspberry Applesauce Jello

This is from my mom and I have had to ask her for it several times. So to save her the headache of finding it one more time, I posted it here for easy access. Also, thought it would be good to share with berry season closing in on us. I love the texture the applesauce adds to this. Definitely a favorite of our family... and easy. Raspberry Applesauce Jello 3 (3 oz) packages raspberry Jello 3 cups 7-up (you can mix water with the 7-up to make 3 cups) Applesauce Lots of Raspberries (about 3 packages frozen) Boil 7-up then add jello slowly, stirring until desolved. Add enough applesauce to make 6 cups. Pour into a 9 X 13 pan. Add lots of raspberries (to your liking). Chill for 3-4 hours or until set. You can top with Cool Whip if you want. Easy!

Thursday, May 19, 2011

Chicken Salad

A few things I love about summer are BBQing, fresh fruits and vegetable, and yummy salads. This is one of my favorites. In fact my sister, Wendi, and I had a chicken salad cookoff. We were so sure everyone woule like ours the best that we both ended up doubling our recipes. Needless to say we had PLENTY of chicken salad. That, and I am sure I was the hands down winner :) This recipe is from a friend our family has known for quite a while. She is a fantastic cook. You know the type. When she has a recipe you know you want a copy because there isn't anything that she makes that isn't wonderful. Thanks Marilyn! Chicken Salad 3 cups chicken, cooked and cubed (I think you could use your canned chicken too) 1 cup grapes (red or green) 1 cup slivered almonds 3 cups celery (I use less as my family aren't celery fans) 1 cup mayonnaise 1/4 cup whipping cream, whipped (love the creaminess this adds) 1 Tablespoon lemon juice salt and pepper to taste Mix he chicken, grapes, almonds and celery. Mix mayonnaise, whipped cream and lemon juice. Fold into chicken mixture and serve on lettuce leaves or croissants. Taste it before serving and add whatever salt and pepper you want to your liking. Yummy! Making this Saturday for lunch!

Tuesday, May 17, 2011

Traditional Chicken Enchiladas

Matt and I have been on the search for a couple years for a great Enchilada recipe similar to the one we have at our favorite mexican restaurant. It doesn't have the red or green enchilada sauce, it's a more of a white sauce but we couldn't figure out what it was. I've seen the recipes using cream cheese and we knew that wasn't it either...there is no hint of cream cheese in our favorites. I finally came across this recipe one day and gave it a go. We both agreed it was the closest thing we've had to the ones at the actual restaurant and we really liked them! This will be our go to enchilada recipe from now on! This picture is from the website (http://www.mexicanfoodrecipes.org) I got the recipe from as I've been having issues with transferring pictures from my camera to my computer.

Traditional Mexican Chicken Enchiladas Recipe

Ingredients -
12 corn tortillas
3 cooked chicken breast halves, no bones or skin, shredded
½ cup chopped green onions
½ cup chopped fresh cilantro
2 cups chicken broth
1 cup sour cream
¾ cup minced onion
12 oz shredded cheddar cheese
4 oz chopped green chilies
¼ cup butter
¼ cup all purpose flour
Vegetable oil for frying

Preparation:

Preheat the oven to 375ºF. Heat 2 tablespoons of oil in a large frying pan over a medium high heat, and then fry the tortillas on 5 seconds per side until they are pliable. Do them individually and add more oil as required. Drain the tortillas on paper towels and keep them warm.

Divide the chicken, onion (not green onion) and 10 oz of the cheese between the tortillas. Roll them up and place in a greased baking pan, seam side down. Melt the butter in a pan over a medium heat. Add the flour and whisk until it begins to boil. Add the broth, stirring continuously.

Add the chilies and sour cream. Stir occasionally and do not let the mixture boil. Pour this mixture over the enchiladas when hot and thick. Bake the Mexican chicken enchiladas for 20 minutes then top with the rest of the cheese and bake for a further 5 minutes. Use the green onions and cilantro to garnish them.

Serves 6


PS- I kept my promise Lorri! Are you proud?!

Sunday, May 15, 2011

Cake Pops


It was my turn to make birthday treats for the young women in our church. I wanted to do seomthing fun and different. After a little bit of brainstorming, my daughter and I decided to try cake pops. They have been wandering around on the internet ever since Bakarella made them famous. But now Starbucks is selling them as a quick, around 100 calorie treat.

They turned out pretty good and got very positive reviews. So positive that seconds were in order.

This recipe is very easy. The trickest part is coating the cake pop with chocolate or candy melts. I think it just takes a bit of practice.

CAKE POPS

1 box cake mix - chocolate is the most dense and easiest to work with, but we did strawberry withoug any problems.

1 can of store bought frosting - we used vanilla but then read the cream cheese is better. Of course you would do chocolate with chocolate cake.

bag of candy melts - or you can use melted chocolate, but the candy melts stayed melted longer AND you don't have to worry about tempering your chocolate. You can find these at most craft stores for a couple of dollars.

Sticks - popscicle style or candy sticks from craft store.

sprinkles, chopped nuts, crushed oreos or whatever else the imagination can think of

Mix cake mix according to package. Pour into a 9 X 13 foil lined pan that has been sprayed with pam. Cook then let cook. Put cake in a mixing bowl and break up with your hands. Scoop 1/2 a container of store bought frosting into the cake and mix. This should bring you back to your playdough days. Great activity when taking out your troubles on :)

I used my cookie scoop and scooped up the dough, rolled it in my hands to form a ball. At this
point I melted the candy melts and dipped the end of my stick into the candy melts then into one of the cake balls stood up in styrofoam (or anything you can think of to hold them up to dry).

I also read later than some people put them in the fridge to help the cake get a little sturdier before coating with candy melts or chocolate. Mine turned out fine, but I do agree this would be helpful.

Melt candy melts/chocolate in microwave dish. Start at 1 minute at 50 percent power, then drop down to 30 second intervals at 50 percent power, stirring in between. Make sure there is NO WATER or MOISTURE. If it gets into the candy melts or chocolate it will seize up and get crumbly. If you want to color white chocolate, use a gel food color, not liquid.

If you need to remelt candy melts, do so at this time by putting the bowl back in the microwave at 30 second intervals at 50 percent power. Stirring in between until ready.

One bag of candy melts will do approximately 20 1 1/2" round cake pops.

Hold your cake pop sideways and spoon the chocolate/melts over while turning the cake pop until coated. Place back in your styrofoam holder. You can also dip them in sprinkles, oreos, nuts before putting them in your holder or sprinkle over the top after.

See, not to hard. The perfect size treat and very eye appealing. Would look great on a dessert table or maybe birthday treats for your kids class.

Here are some other ideas of decorating with the same basic recipe.
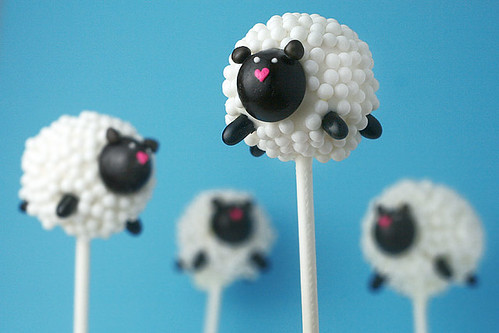
Sheep

Sheep Cake Pops


Easter Eggs


Here they are displayed upside down


How about Thomas the Train display


As you can see, you are only limited by your imagination. There are monster cake pops, christmas trees, Hello Kitty, cupcakes... just google it and then start planning your next party or wedding :)

Friday, May 6, 2011

Bread Cones

I saw this recipe awhile ago and bookmarked it for further exploration later. For some reason, this seems like such a fun spring idea. Maybe making the cones and putting some delcious chicken salad in them. I can see a picnic or luncheon with the ladies. The one thing about this recipe is that they use small metal cones to wrap the dough around. I don't know about you, but I loaned all my fancy metal cones out and never got them back (okay, I never really had any to start). I did find that one suggestion was to use sugar ice cream cones and wrap foil around them, THEN wrap your dough around the foil. Another woman tried using cardstock (she used old brochures mailed to her). She wrapped them in the shape of a cone and then wrapped the foil around them. Then wrapped her dough around the cone. She said it worked fine. So now I have given you some inexpensive options. Here is the recipe below, and cookingbread.com is the site the hosted it. They have detailed step by step directions with pictures. Which makes it a little easier I think. Also, HERE is the recipe card version.

Bread Cones:

Ingredients

Dough:

  • 1/2 cup milk
  • 1/2 cup water
  • 3 tablespoons oil
  • 1/4 cup sugar
  • 1 beaten egg
  • 1 1/2 teaspoon salt
  • 2 1/4 teaspoon instant yeast
  • 3 1/2 to 4 cups bread flour

Egg Wash:

  • 1 egg
  • 1 tablespoon milk

Method

Pour milk and water into a saucepan and heat to a scald. Pour this into a large bowl, allow to cool to lukewarm. Add in oil, sugar and salt; mix with a wooden spoon till well blended. Add in beaten egg and 2 cups of flour; mix till smooth with a wooden spoon. Add in instant yeast and mix. Allow to sit for 10 minutes uncovered. Now, start to slowly add in more flour. When the mixture becomes to hard to mix, pour out onto a well floured surface and knead in more flour for 8 minutes. The dough will become smooth and elastic. Add just enough flour that the dough no longer sticks to your hands while kneading. Add a tablespoon of oil to a clean bowl and place the dough into the bowl. Turn over a few times to lightly coat all sides with oil. Cover with plastic wrap and allow to rest till double in bulk, about 1 hour. Remove dough and knead a few time to release the gas. Now cut the dough into 8 pieces. use a scale to make sure each piece is equal in weight. Allow to rest for 5 minutes. Take each piece and roll into a 36 inch rope. Roll ropes around the greased 6 inch cream horn tubes. Place onto a cookie sheet lined with parchment paper and cover with plastic wrap. Allow to rest for 30 minutes. Bake in a preheated 350 degree oven for 20 - 22 minutes or till golden brown. Place onto a wire rack and allow to cool for a couple minutes before removing the tubes.

I would be curious if you could take this same technique and maybe try it with your favorite dough. If anyone does this, let us know how it works. Good Luck!

Monday, May 2, 2011

Island Pork

Yes, I know you thought we had all died and no one was manning the blog.

BUT, this weekend I spent some time with my sisters and they are

COMMITTED

to putting at least one new recipe on each month. Funny thing was, my one sister kept telling us all these wonderful, delicous recipes that she had made that were definitely blog worthy. Hmmm, holding out on us?

So here is a new contribution. My mother-in-law brought this recipe back from Utah. I believe she got it from my sister-in-law who got it from someone and so on. It was delicious. It is also one of those recipes that you put in in the morning and when it is time for dinner, and life is scattered and falling apart, you have a warm yummy meal for your family.

Island Pork

2 lb Pork Tenderloin

Season with:
2 tsp salt
1/2 tsp pepper
1 tsp cumin
1 tsp chili powder
1 tsp cinnamon

Sear seasoned pork in 2 tablespoons of oil in a frying pan.

Mix the following together and rub over tenderloin.
1 cup packed brown sugar
2 tablespoons chopped garlic
1 tablespoon tabasco sauce

Bake in covered pan at 300 degrees for 3-4 hours (or place in crockpot and cook for 6-8 hours).
Pull apart and serve with coconut rice and mango.

Coconut Rice

2 cups rice (can be white or brown, I prefer Jasmine)
1 1/2 cups water
1 can coconut milk (can be found in ethnic section)
1/3 cup of sugar (or more to your taste)

Cook for 15 minutes. Turn off stove and let sit for 10 more minutes or until done.

Serve rice with Island Pork topped with fresh mango. YUM!

I don't have a picture yet, due to the fact I haven't made it. My mother-in-law served it at our family dinner. I then requested the recipe and have it on my list of things to make the end of this week or beginning of next. So watch for it :)