Tuesday, November 27, 2012

Melt in Your Mouth Shortbread Cookies

Does it ever amaze you how you can be married for 25 years and then, out of the blue you find out something about your spouse you never knew. Such as, his pet peeve is breaking the spaghetti noodles in half before cooking them. Or that his second favorite kind of cookie (after the obvious chocolate chip) is shortbread.

Last night we wanted a little treat, and with this new information and knowing I didn't want to whip up a big batch of chocolate chip cookies, I found this little gem. Only 4 ingredients and they truly do melt in your mouth AND they were so quick to make.


MELT IN YOUR MOUTH SHORTBREAD COOKIES

1 cup butter (no substitutes)
1/2 cup powdered sugar
1/4 cup cornstarch
1 1/2 cups flour

Make sure you butter is softened (9-11 seconds in the microwave usually does it). Whip the puddin out of the butter. Put your mixer on high and let it go for about 3 minutes (wipe down the edges once or twice). Add your powdered sugar and let it mix another minute or so. Then add the cornstarch and flour. Whip it again for an additional 2 minutes.

Place on cookie sheet about 2 inches apart. The dough is soft so I used my cookie scoop. Bake at 350 degrees for about 10-12 minutes. You want the edges so they are just starting to turn light brown. Take them out and let them sit for a few minutes to cool or they will fall part.

Just as good the second day :)

My Notes: I think these would be a great holiday cookie, You could drizzle with a little chocolate like the picture, or put your thumb print in the top before baking and add a little dollop of jam. It could be a versital dough to play with.

Wednesday, November 14, 2012

Pesto Baked Chicken

This is what we had tonight (per request from my 10 year old). I like this because if you make your own or look really hard, you can find pesto sauce which is SCD compliant for my 17 year old. It is also VERY EASY to make, which you will like. I would also say that it is a nice enough dish to make for company. So, all pluses and no minuses.

I got it from this site (they have a picture too)....
http://www.kalynskitchen.com/2010/09/easy-recipe-for-baked-pesto-chicken.html

Pesto Baked Chicken

Ingredients: 4 boneless, skinless chickenn breasts
salt and fresh ground black pepper for seasoning chicken
1/2 cup basil pesto
2 oz. (1/2 cup) grated low-fat mozzarella cheese
Instructions:
Preheat oven to 375 degrees.Cut each chicken breast lengthwise into 2 or 3 pieces. 

Spray a 9" x 12" baking dish with non-stick spray, then spread 1/4 cup basil pesto over the bottom of the dish. Lay chicken strips over the pesto, then spread 1/4 cup more basil pesto over the chicken.

Cover the baking dish with aluminum foil and bake the chicken for 30 minutes, just until chicken is barely firm and cooked through. (Don't cook too much at this point, or the chicken will be overcooked by the time the cheese is melted and browned.)

When chicken is barely cooked through, remove foil and sprinkle chicken with 1/2 cup grated mozzarella cheese. Put dish back into the oven without foil and cook 5 minutes more, just until cheese is melted. After the cheese is melted for 5 minutes, switch oven to broil and broil for 5 minutes more, just long enough to get the cheese lightly browned.

Serve hot. There will be some flavorful juice in the bottom of the dish when this is done, so you may want to serve with rice, couscous, or quinoa to soak up the juice, but if you're eating this for phase one, just spoon the juice over the chicken.
 
I bought a container of pesto and didn't measure it all out. I put half on the bottom and spooned the rest over the top of the chicken. I then grated cheese over the top until it was all covered. So don't worry about measuring it all out, it will still turn out yummy.

Pumpkin Dessert

My mom was gallavanting around the country this summer and picked up this yummy recipe in the process. We may let her gallavant around more often if she comes home with more gems like this. She made it for us Sunday and I added it to my list of definite blog worthy recipes. I am making it tomorrow for my daughter's teacher appreciation luncheon, so will post a picture tomorrow after making it.


Pumpkin Dessert

2 (15 ounce) cans solid pack pumpkin
1 (12 ounce) can evaporated milk
1 cup sugar
3 eggs
1 tsp vanilla extract
1 package yellow cake mix
1 cup butter, melted
1 1/2 cups chopped pecans (optional, unless you are me, then they are required)

Frosting:
1 (8 ounce) package cream cheese, softened
1 1/2 cups powdered sugar
1 tsp vanilla extract
1 (12 ounce) container frozen whipped topping, thawed

Line a 13 X 9 inch pan with waxed paper and coat the paper with nonstick cooking spray; set aside. In a large mixing bowl, combine the pumpkin, milk and sugar (she also added 2 tsp of cinnamon). Beat in eggs and vanilla. Pour into prepare pan. Sprinkle with dry cake mix and drizzle with butter. Sprinkle with pecans and bake at 350 degrees for 1 hour or until golden brown. Cool completely in pan on wire rack. When cooled, invert onto a large serving platter; carefully remove wax paper. In a large mixing bowl, beat cream cheese, powdered sugar and vanilla until smooth. Fold in whipped topping. Frost dessert. Store in refrigerator.

She used real whip cream instead of the whipped topping. It was delicious :)

Monday, May 28, 2012

Black Peppered Shrimp and Dipping Sauce

Can you believe this is SCD legal :)

I was a little nervous with all the pepper in this, but if you like shrimp, it is a winner!!!


Black Peppered Shrimp and Dipping Sauce

2 lbs of shrimp, raw, deveined, unpeeled, thawed (about 21-30 count)
3 cloves garlic
1 1/2 tsp kosher salt
1/2 cup fresh lemon juice
1/2 cup olive oil

3 T black pepper (I like coarse ground)
1/2 cup butter

crusty loaf of bread (not SCD legal)

Rinse shrimp and pat dry so marinade will stick better.

Squeeze lemons until you have 1/2 cup of lemon juice. Throw in blender with garlic, salt and blend until garlic is in itty bitty pieces. As blender is running, drizzle in oil. I just guesstimate try and do about 1/4 cup or so. Put this in a gallon size ziplock bag with shrimp. Let sit for 20 minutes. Not to much longer or the citrus will cook the shrimp and it will be tough.

Turn on oven broiler. Line cooking sheet (with sides) with foil for easier cleanup. Dump all the contents of ziplock bag on foil. Sprinkle on half the pepper, stir around and add the rest of the pepper and stir again. I know 3 TABLESPOONS seems like a lot, but it turns out... trust me. Because the shrimp has the shells on, it isn't to spicey.

Next I take my cube of butter from the freezer (forgot to tell you about that step) and using a cheese grated, grate it over the shrimp trying to spread it evenly. I actually only use about 3/4 of the stick of butter. Put pan under broiler for 5 minutes or until shrimp start to turn pink, turn shrimp over and cook for another couple of minutes. Don't overcook or they will be tough.

Put shrimp on platter and pour juices in a boil for dipping shrimp and piece of your crusty bread in.

YUMMY!

* Now this is where I get on my soapbox, since we are trying to be more aware of what we are eating with Courtney's Crohn's. Most shrimp in the grocery store is from Eastern Asian countries. They raise their shrimp on farms and end up having to put chemicals in the water to prevent disease and keep the growin. Three different banned antibiotics were found in the shrimp: enrofloxacin, an antibiotic banned in animals that Americans eat because it damages the immune system; chloramphenicol, suspected to cause cancer in humans; and carcinogen nitrofuranzone, which was banned in the U.S. 40 years ago.


So look for wild caught shrimp (it will cost your around $1 more a lb) and verify with restaurants as to where they get their shrimp. You might have to deveine them yourself. But it is as simple as using some kitchen shears and snipping up the backside and cleaning out the vein with water.


Thursday, May 10, 2012

Cheese Crisps

One of our newest favorite quick snacks. My daughter had a 17th birthday party at our house. We had snacks out, and this was one of them that Courtney could have as well as 2 of her gluten free friends. We also had salsa and a big bowl of tortilla chips. The cheese crisps were the first to go, and at the end of the night I still had a big bowl of tortilla chips. Everyone who has tried them has loved them. So try this for something new and as an alternative.

Cheese Crisps

Shredded Cheese
Parchment Paper
Seasonings (optional)

Heat oven to 350 degrees.
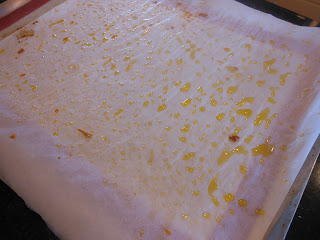
Shred cheese onto parchment paper that has been placed on a cookie sheet. Spread out in a thin layer.
You can add any seasonings you want... 
garlic powder, cayenne pepper for kick, basil, chili powder etc.
Plain is good also.


Cook for about 5-7 minutes. You can see below that I put a little to much cheese on. So the
edges were crisp, but the middle was firm but not crispy. In this case, you can cut them into 
pieces with kitchen shears (see below). Put them back on the cookie sheet and put under the
broiler for a few seconds until they are cooked more. You can also flip them if need be.


Cut cheese into strips and then into squares (or triangles).


You can see why the parchment paper is important. The excess oils stay on the parchment
paper. Foil or cooking spray does NOT work.


Put them in a bowl and serve.


You can use store bought already shredded cheese, but check the ingredients
as most of that has potato starch to keep it from sticking together. Using just
a regular block of cheese ans shredding your own is better for you  :)

And even before I have posted this, all my cheese crisps I made for this post are
gone and they are asking for another batch.

Bacon and Green Beans

We have been trying to eat more veggies lately. Often when we think of quick foods, it is something that comes in a box and all we have to do is add water and presto... deliciousness. This is one quick go to recipe that my kids have really enjoyed.


Bacon and Green Beans

Fresh Green Beans (not canned)
Bacon
Onions
Sliced Almonds (optional)

I use the fresh green beans from Costco. Before you start, rinse them and chop
off the ends. Let them dry on a kitchen towel so there won't be any water
added to the bacon or it will splatter.

Use as much or as little bacon as you like. I usually go a little heavy as
my family really likes bacon. Cut it into pieces and start cooking it in a pan. When it starts
getting close to done, add chopped onions. Again this is a preference thing. Lets give it
a ration of 1/3 lbs bacon to 1/2 of a medium chopped onion. Cook until onions are
getting soft and translucent. Bacon should "almost" done, but not quit. After a couple
of attempts you will find when you like adding each ingredient. Drain off as much
bacon grease as you want.

Add green beans and cook in pan (you can add a lid to help them cook).
This is also when you would add your almonds if you desire. Stir periodically 
until they are done to your liking. We like ours with a bit of crunch.
Serve warm.

Green Smoothies

I am not usually a big cooking gadget buyer. If I can make do with what I have, I do. Because how many of us have purchased a bread machine, juicer, or other amazing appliance only to find it stuffed to the back a few months later. But this has really been one of my best purchases. I was really leery about forking out the money since it is pretty pricey, but we use it at least daily. It is my new Blentec


And yes, I bought it in the Red. It is a thing of beauty. My sister-in-law was traveled a few hours up north to buy it at Costco because they were running some sort of special (she was buying one for herself also). I figured if I didn't like it, I could always return it to a local Costco. After the first smoothie we have never looked back. It has the power of the commercial blenders at Jamba juice. It also has a counter and to date we have made over 200 smoothies (and we have only owned it for a couple of months). AND we are eating more fruits and veggies because of it. So I will be sharing some of our favorite smoothie recipes (and hopefully Wendi and Steff will join in and add their favorites). We are having a smoothie off at our Butler family reunion in July, so we might not share our best ones until then. 

This is one that Wendi said she liked and we really like it too. It isn't really sweet, but is a great way to get spinach into your kids. Yes, you have to get past the green color, but give it a try.


Green Smoothie


Serves 1
Ingredients:

1 frozen bana
1 Tablespoon peanut butter
1/2 cup Greek yogurt
1 cup almond milk (or other kind of milk)
4 cups baby spinach (more, or less)

Directions:
Combine all ingredients in a blender and blend until smooth

Nutritional stats:
350 calories, 10g fiver, 21 g protein


Here are a few health benefits:


  • Spinach is fat free, cholesterol free, low in calories and very low in sodium
  • Spinach is an excellent source of vitamin A, C, K, iron, fiber, folate, and lutein
  • Leutin is an antioxidant that promotes good eye health, and may help prevent cancer of the liver,ovaries, colon and prostate, and even dementia.
  • Dole lab tests found spinach juice has twice the chlorophyl, eight times the calcium, six times the magnesium, 10 times the potassium, 15 times the vitamin C and 43 times the vitamin A of wheatgrass juice!

SCD YOGURT - For my daughter we used SCD yogurt, which is yogurt you make yourself. Make sure when you purchase yogurt that it has ACTIVE CULTURES. Most yogurt is crap (excuse my language). It really doesn't do anything to help your gut. Active cultures re-introduce the good bacteria into your digestive system which we lose through medications, eating processed foods etc. Making your own yogurt gives you  700 billion good bacteria per cup, lots of protein, vitamins, minerals, amino acids in an easy to digest. It is also fermented for 24 hours as apposed to commercial yogurt which is 4 hours. The 24 hour process gets rid of the lactose and makes it easier to digest. If you are interested in the directions... look HERE. I will probably do a post about it later.

ALMOND MILK - You can purchase the almond milk you buy in the store, but it isn't very hard to make your own. And all it has in it is almonds.... imagine that. The store bought Almond milk has things like cane sugar and carrageenan. HERE are the simple directions to make your own. If you dry the leftover almonds it becomes almond meal or almond flour depending on if you used blanched almonds or not.